Big Top
Concept to Character
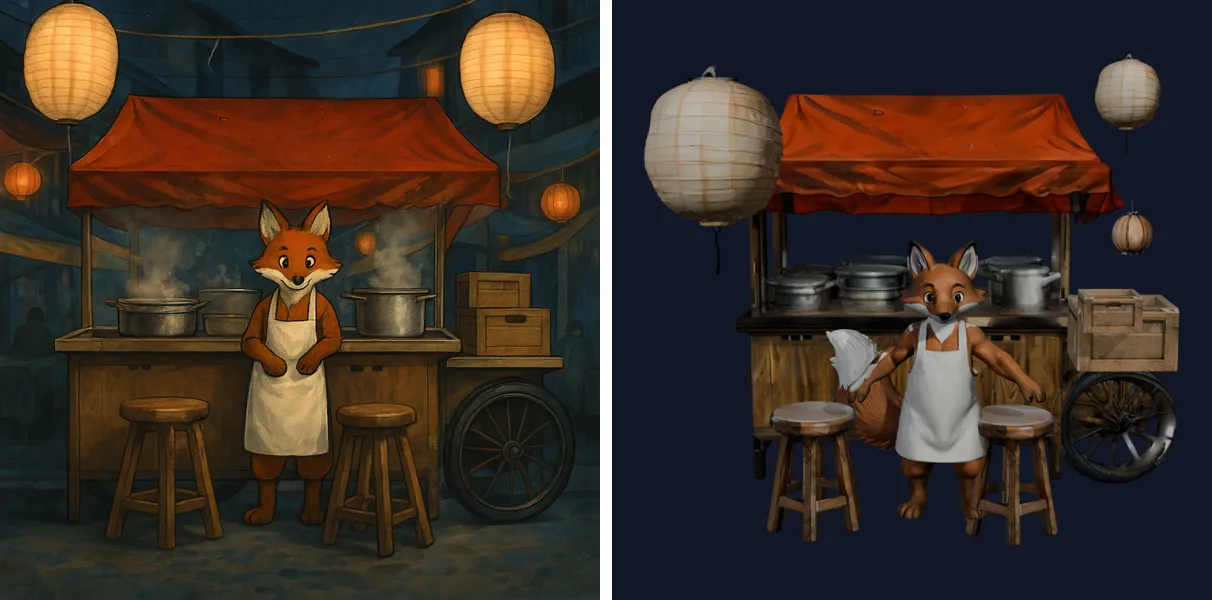
Miso the fox and his noodle cart, followed step by step from a painted concept to a scene of separate objects, a built and textured character, a rig and a walk.

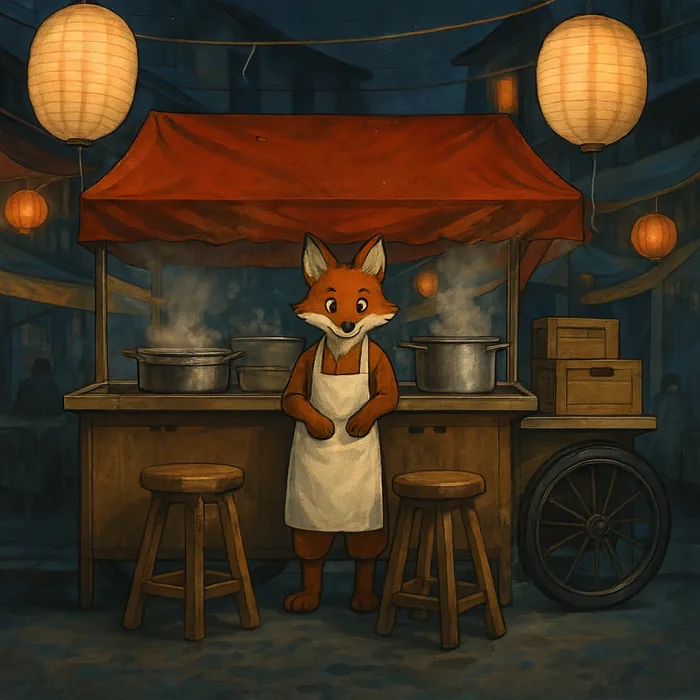
Our demo character is Miso, a fox who cooks noodles at a cart in a rain-slick night market. He and his cart were made entirely inside the suite, starting from a sentence, and every step below is a job that wrote an asset with its parents recorded. This page follows them through it in order.
1. A concept, in the show's style
The work starts in Concept. The shot Miso lives in inherits a style named Night Market, a paragraph about warm lantern light against deep blue shadow and soft painterly brushwork. The artist describes the cart, the stools, the steaming pots and the fox in front of them, and the style is appended to that description automatically.

Each variation gets its own seed and lands in the library as an asset the moment it finishes, recording the prompt, the seed, the settings and the style it was made with. One press of Studio on the chosen variation makes it Studio's source image, with no download or upload in between.
2. One box per object
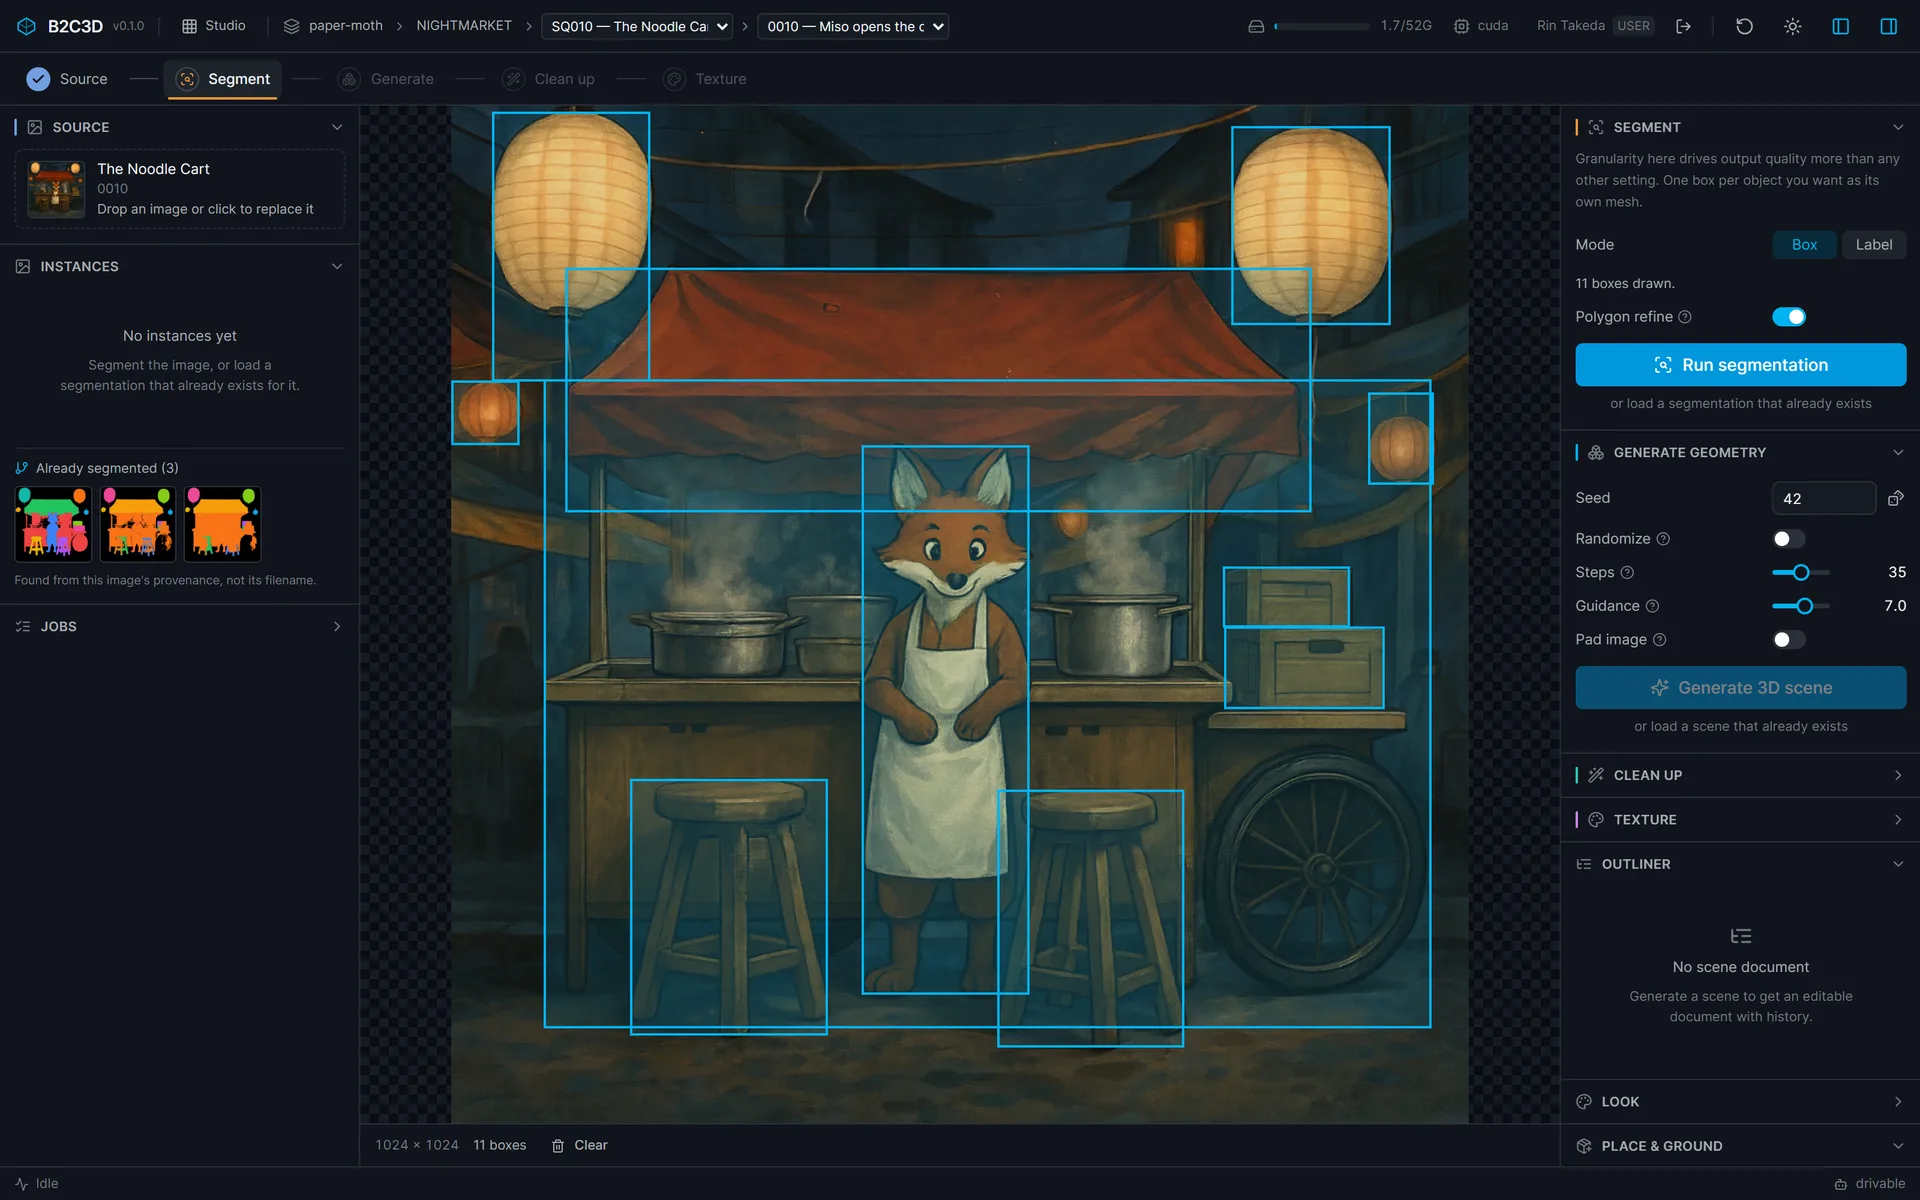
In Studio, the artist draws a box around every object that should come out as a mesh of its own: the canopy, each lantern, the crates, the two stools, and Miso. Giving Miso his own box is what lets him be rigged later as one object of the scene. How finely the image is divided matters more to the result than any other setting, so this step belongs to the artist, not the model.
3. Generated together
The objects are then generated in one diffusion pass, with attention shared across all of them, so each object is shaped knowing where the others are. They come out as separate meshes that already share one frame. Nothing is re-centred afterwards, because re-centring is the step that would throw that arrangement away.

Texturing renders six views of every object and bakes them into its own UV texture. The views are kept on the textured scene, so a disagreement between them can be traced and that one object textured again with a different seed.
4. Matching the concept's composition
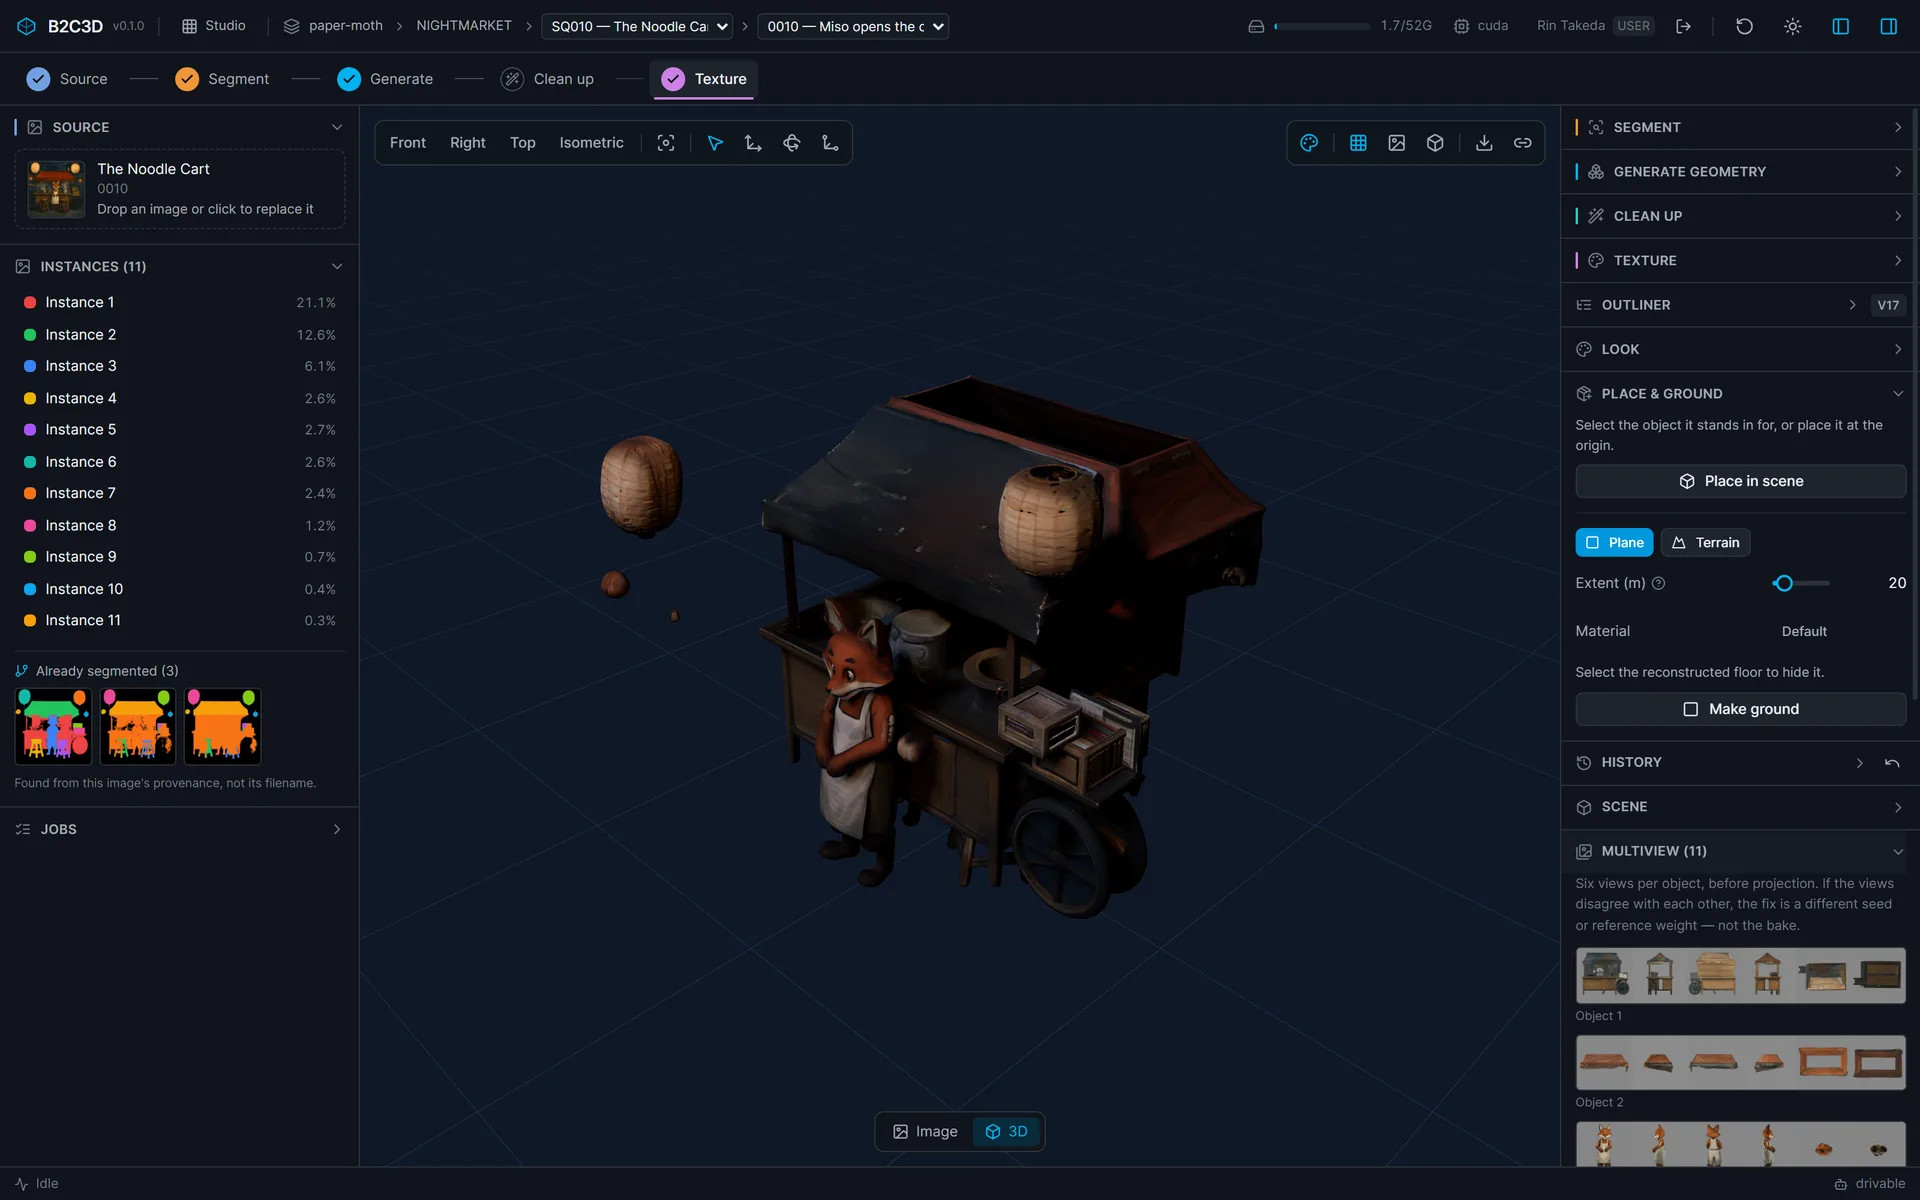
A generated scene should look like its concept from the concept's camera. The first generation did not: Miso came out inside the cart's volume, behind the stools, because depth order between overlapping objects is where the scene model is weakest. Our composition-matching research fits the placed objects to the concept's silhouettes, from the concept's camera, and the match_composition operation runs it inside Studio.
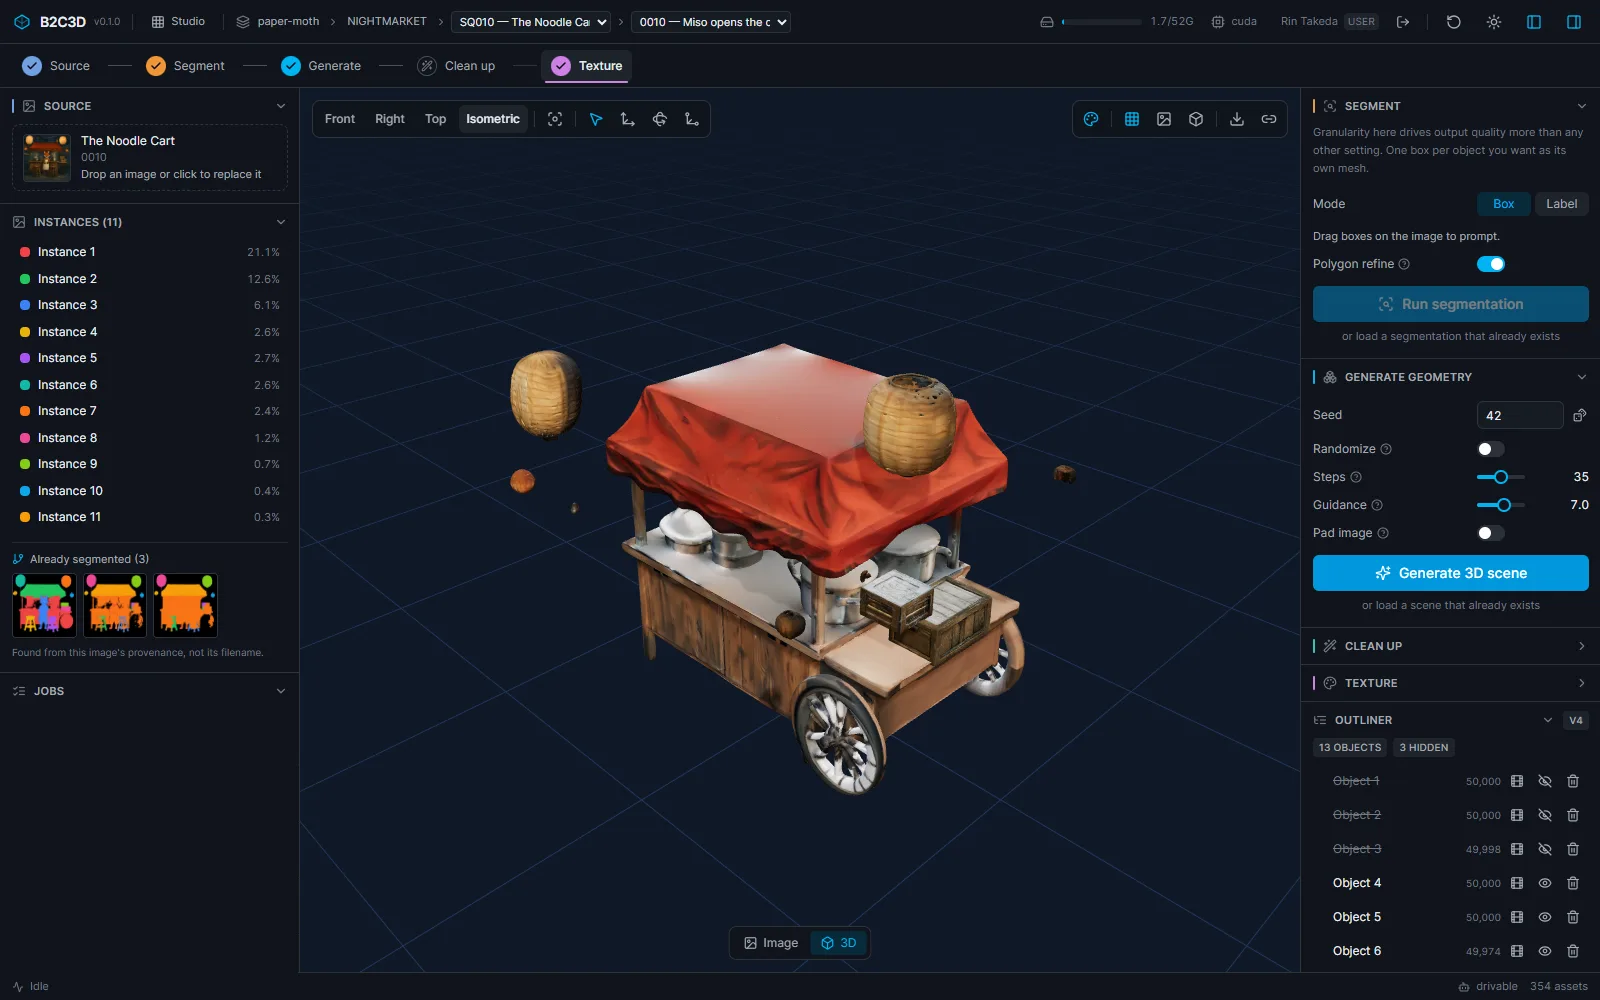
A silhouette cannot say which way a character faces, or whether he stands in front of the counter or behind it, so the automatic fit cannot place Miso alone. In the current set, his place was set by hand to match the concept: in front of the counter, between the stools. Every other object in it has been regenerated on its own, the cart, both lanterns, the small lantern, both crates and both stools, and placed where the scene put them.
5. Miso on his own
A character that will be rigged needs more detail than one object of a scene can carry, so Miso is also built on his own through a per-asset chain. He is lifted out of the scene concept itself, so he matches the shot he lives in: orange paws, a cream apron and no headband.
Small regions are where a generated character falls down, and hands are the hardest. A concept painting is not always a reliable guide to what a character's hands should be, so the suite does not pick a default: whoever makes the character chooses, in the interface or through the API. For Miso the answer was paws, as the concept paints them.

He is lifted out of the concept and re-posed into an A-pose with his arms out.
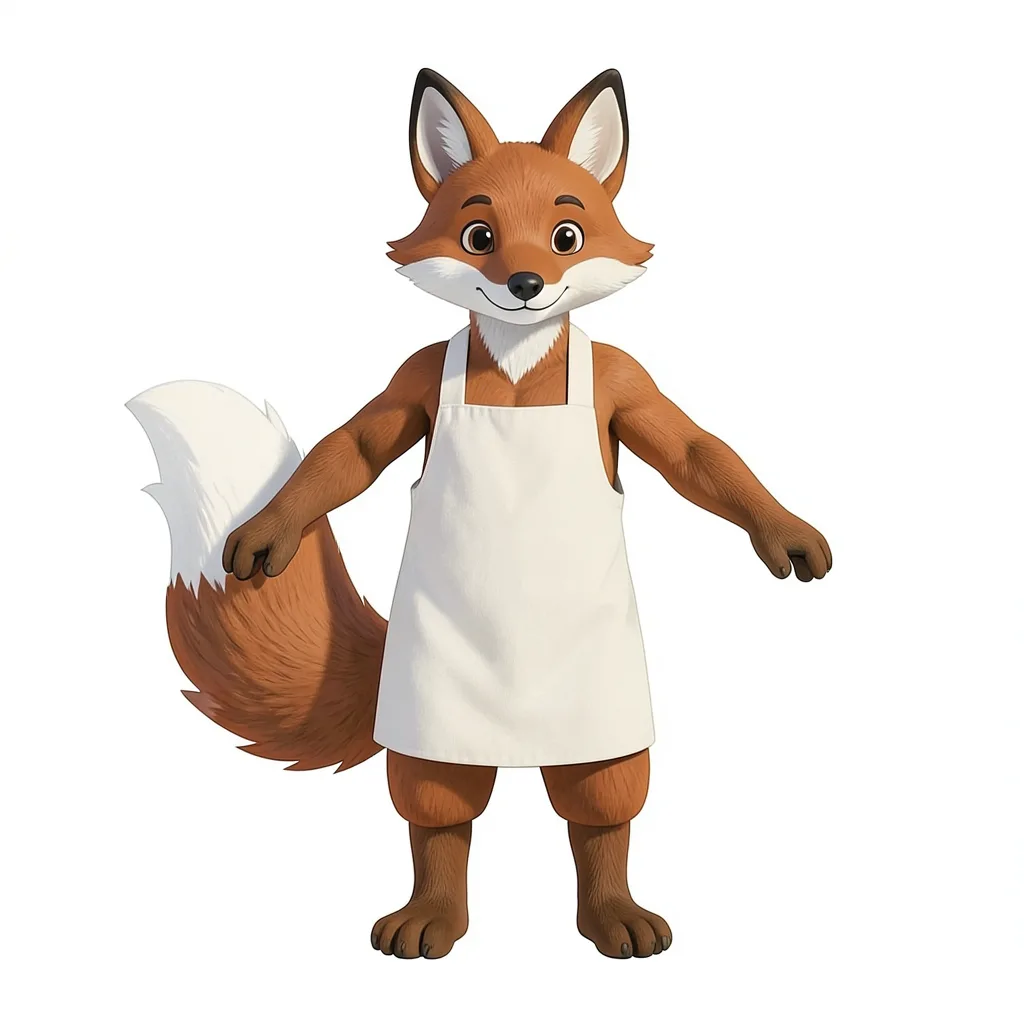
From that image a turnaround is generated: six views at eye level, from the front, at 45 and 90 degrees, from the back, and at 270 and 315 degrees. The mesh is built from the views and textured from the same views, lined up with each other before anything is painted so that the seams where one view hands over to the next do not show. The cart goes through the same texture step.


6. A skeleton, fitted by measurement
In Rigging, the automatic rig refused Miso: its safety check read his tail and legs together as a four-legged body. So he gets a standard humanoid skeleton, fitted by measuring his mesh, the same way as the character studies. Two parts of that fit were made for bodies like his. Each leg is followed up from its foot, so the tail is never taken for a third leg, and the neck is placed between the chest and the head rather than in his long muzzle.
The fix: his large head and muzzle still defeat the automatic search for the neck, so a person sets one value, his neck height, and the fit places the joints from it. Estimated artist time: about 2 minutes.
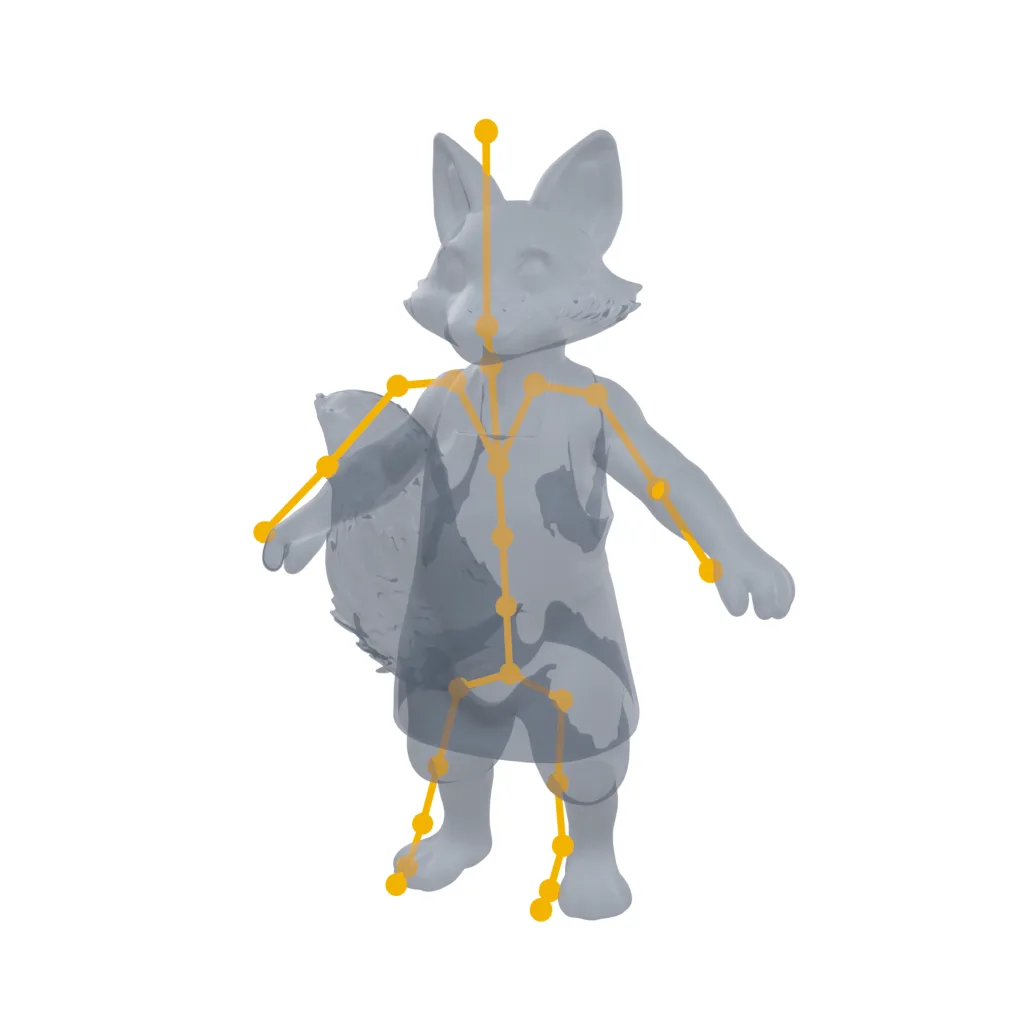
The standard skeleton has no tail bones. The fit no longer mistakes his tail for a leg, an arm or the torso, and the automatic skin weights carry the tail with his hips, so it moves with his body as one piece. No one binds it by hand.
7. Motion
In Animate, a forward walk from the curated motion library is retargeted onto Miso's rig. Retargeting reads both skeletons as a body, hips, spine, arms and legs, and pairs them part to part, so a take recorded on a person drives a fox. Root travel is scaled to his hip height, and the walk plays on his own textured mesh.
Walk motion from the 100STYLE dataset (Mason, Starke and Komura), CC BY 4.0.
What it leaves behind
Every step above wrote an asset, and every asset records the one before it. Open the textured cart in Assets and Came from walks back through the cleaned scene, the scene and the segmentation to the concept image, and from there to the prompt and style it was generated from.

Gallery

The set, from three-quarter. The cart from six angles. Miso from six angles.
Related work
-

BigBluePipeline
A VFX studio pipeline, rebuilt as the artist-side front end for Big Top.
-
Depth2STL and Obj2GLB
Two small open-source tools for getting 3D data where it needs to go.
-

QIE Studio
An image generation and editing studio, built by an AI agent working unattended from our specification.
-
AuRA Avatar Generator
Customizable, photorealistic presenters for AI-generated video briefings.